
Quickstart
This walkthrough introduces the essential workflow in RayMol: fetching a structure, navigating representations, making selections, taking measurements, refining lighting and materials, and exporting your final figure.
1. Load a structure
Section titled “1. Load a structure”There are three quick ways to bring a molecular structure into RayMol:
Command Console
Section titled “Command Console”Press ⌘1 (or click the Console pill in the top rail) to toggle the built-in command prompt, then fetch a structure directly from the RCSB Protein Data Bank:
fetch 1ubq, async=0RayMol downloads ubiquitin (1ubq) and loads it into the 3D viewport.
File menu
Section titled “File menu”Choose File ▸ Fetch from PDB… (⇧⌘O) to enter a 4-letter PDB ID, or choose File ▸ Open… (⌘O) to open local .pdb, .cif, .mmcif, .sdf, or .pse files.
Drag and drop
Section titled “Drag and drop”Drag any supported structure file from macOS Finder directly onto the RayMol 3D viewport. A blue highlight indicates the drop target.
2. Navigate the interface and Inspector
Section titled “2. Navigate the interface and Inspector”RayMol’s main window is organized into the Metal 3D viewport on the left and the Inspector sidebar on the right (or bottom in mobile portrait).
The Inspector features five functional tabs:
- Objects: Structures, selections, multi-state models, and alignments.
- Scenes: Store and recall camera angles and representations.
- Movie: Keyframe animation, scenes, and camera tracks.
- Notes: Session-linked observations and analysis notes.
- Display: Canvas, lighting, shadows, ray tracing, and post-processing effects.
Switch between tabs by clicking the segmented switcher at the top of the Inspector.
┌───────────────────────────────────────┬───────────────────────────────────────┐│ [Console] [Seq] [Tools ▾] │ [Objects][Scenes][Movie][Notes][Display]├───────────────────────────────────────┼───────────────────────────────────────┤│ │ ☝ Residues ✕ sele ││ ├───────────────────────────────────────┤│ │ all [A][S][H][L][C] ││ 3D Metal Viewport │ ▼ OBJECTS (1) ││ │ 1ubq [A][S][H][L][C] ││ │ ▼ SELECTIONS ││ │ (No selections) │└───────────────────────────────────────┴───────────────────────────────────────┘3. Control representations and colors (A / S / H / L / C)
Section titled “3. Control representations and colors (A / S / H / L / C)”Every object row in the Objects inspector carries five action buttons:
- A (Action): Preset views, centering, alignment, hydrogen handling, and object duplication or deletion.
- S (Show): Display specific representations (cartoon, sticks, spheres, surface, side chains).
- H (Hide): Hide representations or selections.
- L (Label): Display residue numbers, atom names, elements, or chain identifiers.
- C (Color): Color by element, chain, secondary structure, b-factor, spectrum, or named color palette.
The pinned all row at the top applies actions across every loaded object simultaneously.
Try common representations
Section titled “Try common representations”In the 1ubq object row:
- Click H ▸ everything to clear the current representation.
- Click S ▸ cartoon to render the protein backbone.
- Click S ▸ side chains ▸ as sticks to display non-backbone residues cleanly attached to the ribbon.
- Click C ▸ by chain (or choose a shade from C ▸ blues ▸ marine).
You can also run standard PyMOL commands in the console:
hide everything, 1ubqshow cartoon, 1ubqshow sticks, 1ubq and (sidechain or name CA)color marine, 1ubqutil.cnc('1ubq')4. Pick, select, and box-select
Section titled “4. Pick, select, and box-select”RayMol provides precise selection controls directly in the viewport and Inspector.
Click picking
Section titled “Click picking”Click any residue or atom in the viewport. Pink indicator squares appear around selected atoms, and a new sele entry appears under the SELECTIONS section in the Inspector.
Selection mode
Section titled “Selection mode”RayMol controls what a single click selects (atoms, residues, chains, segments, objects, molecules, or C-α).
- Check the current mode next to the tap icon in the Inspector header (defaults to Residues).
- On macOS, press
Tabor⇧Tab(with the command line empty) to cycle through selection modes without opening the menu.
Box select
Section titled “Box select”To select an entire binding pocket or region with a marquee box:
- On macOS choose Tools ▸ Box Select (
⌃S); on any platform click the lasso icon in the SELECTIONS section header. - A rubber-band frame appears over the viewport. Drag the edges or corners to enclose your target atoms.
- Press
Esc(macOS) or click the ✕ button or the lasso button to exit Box Select.
Clear selections
Section titled “Clear selections”- Press
Esc(macOS) once to deselect atoms; pressEsca second time to delete theseleselection. - Alternatively, click the clear button (✕) in the Inspector header.
Named selections via command
Section titled “Named selections via command”For exact atom selections, use the select command:
select hydrophobic, 1ubq and resn ALA+VAL+LEU+ILE+PHE+MET+TRPcolor orange, hydrophobic5. Measure distances and angles
Section titled “5. Measure distances and angles”RayMol includes an interactive measurement tool for inspecting distances, angles, and dihedrals:
- Choose Tools ▸ Measure Distances (
⌃E), or open Tools in the top rail and choose Measure. - A measurement bar appears at the top of the viewport with a segmented picker: Distance, Angle, and Dihedral.
- With Distance selected, click two atoms in the viewport. RayMol draws a dotted measurement dash with the distance in Ångströms.
- Switch to Angle and click three atoms to measure bond angles, or Dihedral and click four atoms for torsion angles.
- Click the trash icon to clear measurements, or press
Esc(macOS) to exit measure mode.
Equivalent console commands:
distance dist01, 1ubq and resi 1 and name CA, 1ubq and resi 10 and name CA6. Improve the look: lighting, ray tracing, and materials
Section titled “6. Improve the look: lighting, ray tracing, and materials”RayMol replaces traditional offline rendering with interactive Metal-native lighting and hardware ray tracing.
Switch to the Display tab in the Inspector:
Real-time shadows and ambient occlusion
Section titled “Real-time shadows and ambient occlusion”Shadows and Ambient occlusion are on by default in the Shadows & AO group; turn them off or tune them here.
Hardware ray tracing
Section titled “Hardware ray tracing”On GPUs that support hardware ray tracing, Ray tracing (AO + shadows) under Metal optimization is on by default; turn it off or tune it here:
- Traces real-time occlusion rays across the molecular geometry.
- RT hard shadows gives crisp directional cast shadows (on by default).
- Temporal AO accumulates rays while the camera is stationary for noise-free rendering (on by default).
Apply materials and Looks
Section titled “Apply materials and Looks”RayMol supports physically-based materials including metallic, glass, matte, clay, and marble.
Apply a pre-tuned material look to your structure using the console:
apply_look gold, 1ubq, cartoonOr configure custom surface materials:
show surface, 1ubqset surface_material, marble, 1ubqset transparency, 0.2, 1ubqStudio environment and effects
Section titled “Studio environment and effects”- Outline: Under Effects, toggle Outline to draw crisp silhouette lines around objects.
- Filmic tone-map: Toggle Filmic tone-map for cinematic contrast with soft highlight rolloff.
- Theme Studio: Tap Theme Studio… at the top of the Display tab to switch between built-in viewport and interface palettes (Classic, Paper, Sunset, Dawn).
7. Save your session and export figures
Section titled “7. Save your session and export figures”Save a PyMOL session (.pse)
Section titled “Save a PyMOL session (.pse)”To preserve your molecular state, representations, camera position, and custom colors:
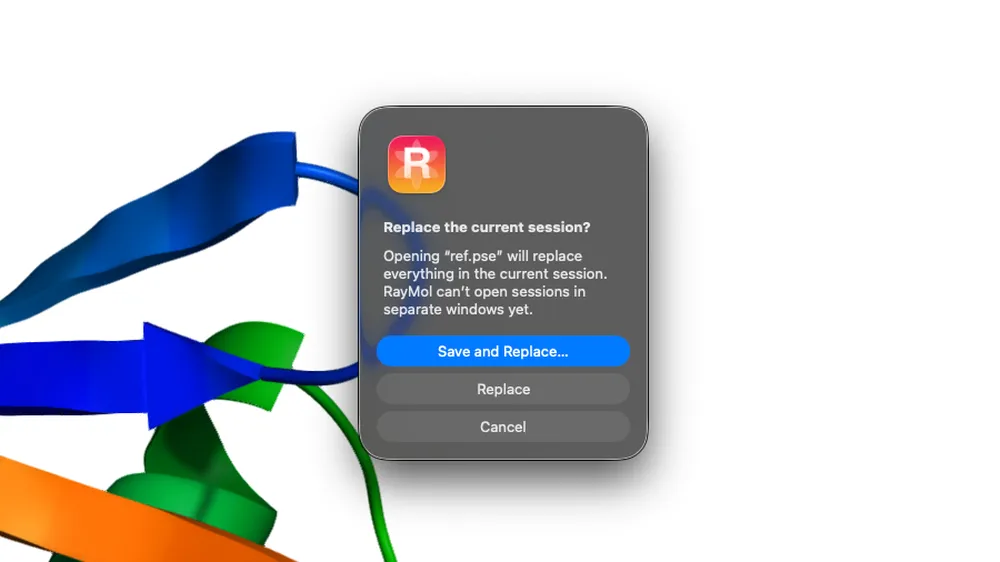 Opening a
 .pse while you have unsaved work asks before replacing it.
- Choose File ▸ Save Session (
⌘S) or File ▸ Save Session As… (⇧⌘S). - RayMol writes a standard PyMOL
.psesession file (RayMol-only render settings are ignored by desktop PyMOL).
Export high-resolution images
Section titled “Export high-resolution images”Choose File ▸ Export Image… (⇧⌘E) to save a PNG at 2× the view size, or use the toolbar Export ▸ Save Image menu to pick Current View Size, 2× View, 4K · 3840 × 2160 or Custom…. Turn on Transparent background in the same Export menu first if you want one.
To quickly copy the current rendering to your clipboard for pasting into presentations or manuscripts, press ⌘C or choose File ▸ Copy Image to Clipboard.
Next steps
Section titled “Next steps”- Explore the Interface Tour for a detailed breakdown of all panels, gestures, and controls.
- Master Selecting, Measuring & Moving for complex molecular manipulation.
- Review Keyboard Shortcuts to accelerate your daily workflow.
- Set up the Model Context Protocol to control RayMol directly from Claude Desktop (direct-download macOS build only).