
Camera, Lens & Depth of Field
RayMol combines PyMOL’s molecular camera model with real-time Metal rendering, offering physical lens simulation, true dolly-zoom perspective shifts, and hardware-accelerated scatter bokeh.
You can adjust the camera using the floating camera dock directly on the 3D viewport, through the inspector panel, or with standard PyMOL commands.
Open camera controls
Section titled “Open camera controls”RayMol provides two primary interfaces for adjusting the camera:
The camera dock: Lens, Zoom and Depth.
- Camera dock: Select the camera button (a circular frosted glass icon with a camera symbol, which appears once a structure is loaded) docked in the bottom-left corner of the 3D viewport. This reveals the Photos-style camera strip at the bottom of the screen.
- Display tab: Open the Display tab in the inspector. The Camera group has the full set of camera, lens, and depth-of-field controls.
The bottom-docked camera strip contains quick-access buttons:
| Tool | Icon | Function |
|---|---|---|
| Lens | Aperture | Adjust focal length in millimeters (12–135 mm) or toggle orthographic projection |
| Zoom | Magnifying glass | Adjust absolute magnification (0.5×–8×) |
| Depth | Center-weighted meter | Toggle depth of field, enable auto-lock autofocus, and set aperture/focus sliders |
| Close | ✕ |
Dismiss the camera dock |
Selecting an icon opens its dedicated adjustment slider above the dock. Selecting the active icon again collapses the slider.
Lens and perspective
Section titled “Lens and perspective”In physical photography, swapping lenses changes how space is compressed: wide lenses exaggerate distance and depth, while telephoto lenses flatten perspective. RayMol models this with a true dolly zoom.
set_fov 27 # ≈50 mm lens; field of view in degrees, the camera dollies to keep framingFocal length (field_of_view)
Section titled “Focal length (field_of_view)”The Lens slider shows a 35 mm-equivalent focal length from 12 to 135 mm.
Internally it sets field_of_view (degrees): 12 mm ≈ 90°, 24 mm ≈ 53°,
50 mm ≈ 27°, 85 mm ≈ 16°, 135 mm ≈ 10°. The default of 20° is about 68 mm.
- Wide angle (12–24 mm): Exaggerates perspective foreshortening. Elements close to the camera appear dramatically larger than elements in the background, creating an immersive, dynamic view inside binding pockets or active sites.
- Normal lens (35–50 mm): Provides natural perspective proportions similar to human vision.
- Telephoto (70–135 mm): Compresses depth. Parallel structural elements appear closer together with minimal perspective distortion.
When you drag the Lens slider, RayMol automatically dollies the camera closer or farther to keep the subject centered and framed to the same size. This lets you dial in perspective distortion without manually re-zooming.
Magnification (Zoom slider)
Section titled “Magnification (Zoom slider)”The Zoom slider controls apparent on-screen magnification from 0.5× to
8× (it has no set command equivalent):
1.0×frames the entire active scene.- Values greater than
1.0×dolly the camera closer for close-up examination. - Values below
1.0×pull the camera back for an overview of large complexes.
Zoom operates independently of the lens focal length. Adjusting zoom dollies the camera without changing perspective compression, and adjusting the lens changes perspective without altering the framing scale. You can also pinch on a trackpad or touch screen to adjust zoom directly.
Orthographic projection
Section titled “Orthographic projection”By default, RayMol uses perspective projection with realistic foreshortening. For figures, technical diagrams, or aligning coordinate axes, switch to orthographic (parallel) projection:
- Select Ortho in the Lens row of the camera dock.
- Or toggle Orthographic under Display ▸ Camera in the inspector.
- In the command line, run:
set ortho, 1In orthographic mode, rays are parallel: objects at the back of the cell appear
at the exact same scale as objects at the front, and distance does not shrink
features. Set set ortho, 0 to return to perspective projection.
Rotation and orientation
Section titled “Rotation and orientation”RayMol provides several ways to rotate and orient the camera:
- Free orbit: Drag with one finger or the left mouse button across the viewport to tumble around the screen X and Y axes.
- Roll (Z-axis rotation): Twist with two fingers on a trackpad (on macOS, in the Trackpad mouse mode, the default) or touch screen to spin the camera around the line of sight (Z axis).
- Constrained turns: In the command line, use the PyMOL
turncommand to rotate around a specific camera axis:turn x, 90turn y, 45turn z, 180 - Movie motions: In Make Movie, you can choose the rotation axis (X, Y, or Z) for Roll and Rock.
- Object-frame transformations: In Move mode (
⌃M), a 3D gizmo appears with dedicated X, Y, and Z translation arrows and rotation rings for each axis, allowing you to position individual structures independently of the camera.
Depth of field (DOF)
Section titled “Depth of field (DOF)”Depth of field renders out-of-focus structures with realistic photographic blur (bokeh), directing the viewer’s eye to a catalytic triad, bound ligand, or interface while keeping the overall protein context softly visible.
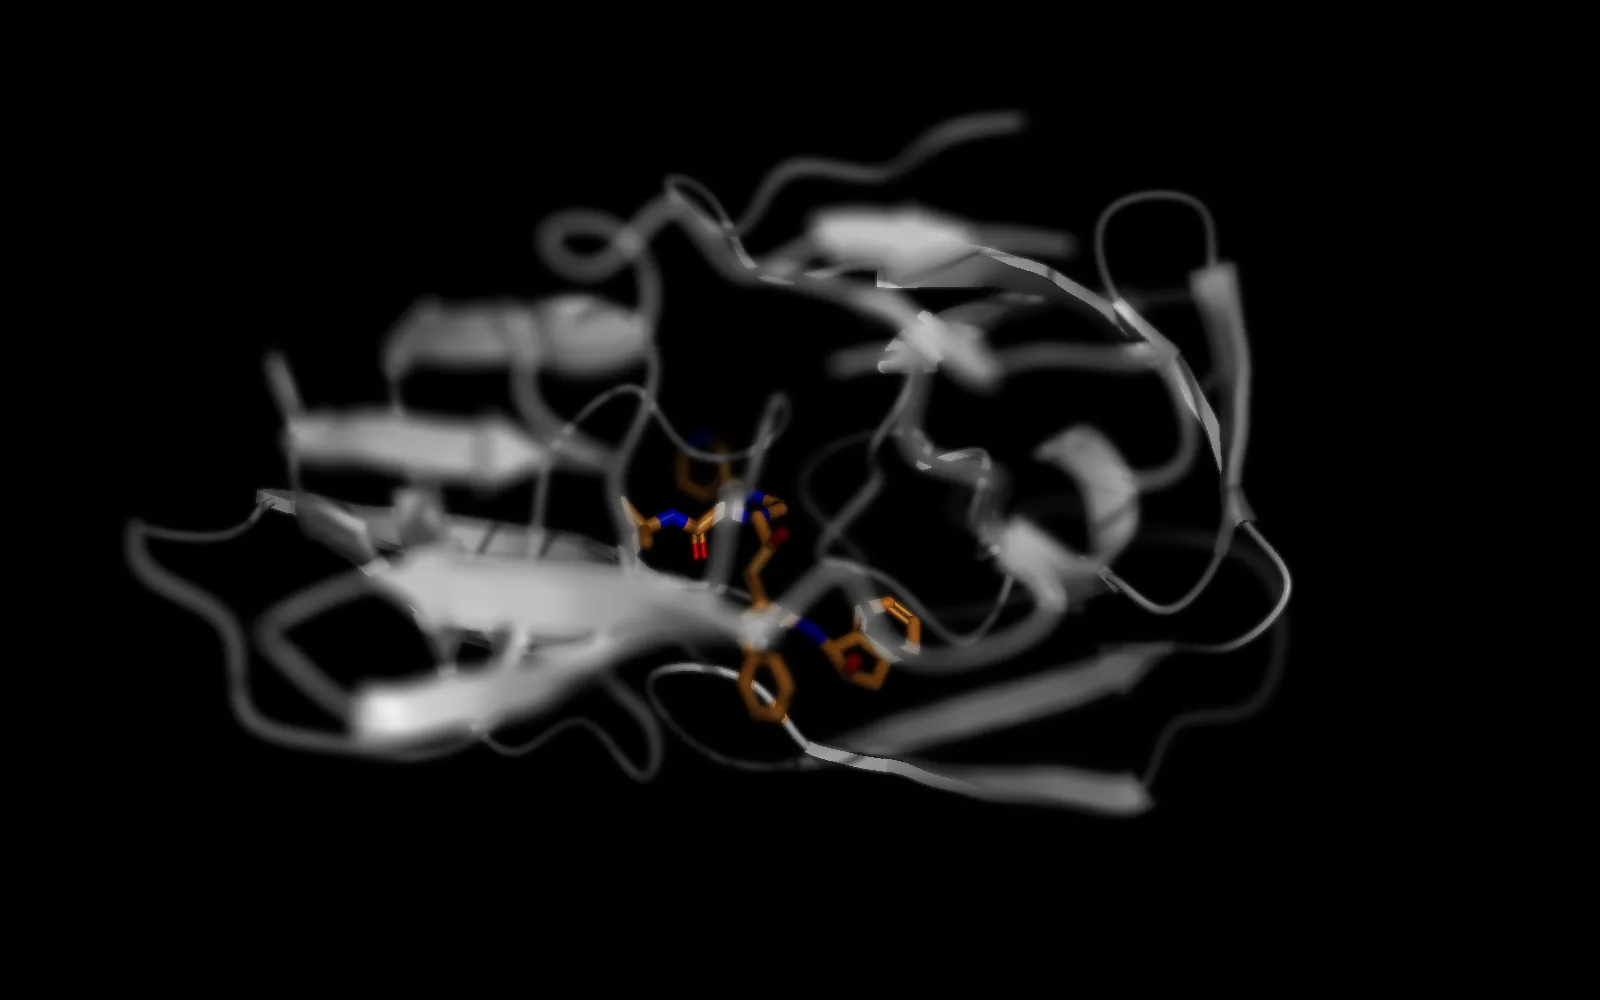 Depth of field with autofocus locked on the ligand.
Enable depth of field by tapping Depth in the camera dock and toggling
Enabled, or set metal_dof in the command line:
set metal_dof, 1RayMol uses a Metal gather post-pass that computes circle-of-confusion blur per pixel based on eye-space distance from the focal plane.
Focus parameters
Section titled “Focus parameters”Once depth of field is enabled, configure the focal plane:
- Focus distance (
metal_dof_focus): The eye-space distance of the in-focus plane (range0to120). A value of0automatically focuses on the camera’s center of interest. When autofocus is active, this slider is overridden. - Focus range (
metal_dof_range): The distance beyond focus before blur reaches its maximum (range0to60, default14.0). Smaller values produce a shallower depth of field with a sharp falloff;0blurs everything off the focal plane immediately. - Aperture / blur radius (
metal_dof_aperture): The maximum bokeh blur radius in pixels (range0to40, default14.0). Larger values produce a wider aperture and stronger blur. Setting aperture to0closes the aperture: there is no blur, and the blur pass is skipped while depth of field stays on.
Bokeh quality levels
Section titled “Bokeh quality levels”The bokeh quality slider is located in the inspector under Display ▸ Camera
as DOF quality (shown once Depth of field is on; metal_dof_quality, values 1–4, default 4):
| Level | Gather Samples | Passes | Description |
|---|---|---|---|
| 1 | 16 samples | Single pass | Fastest performance. |
| 2 | 32 samples | Two-pass | Adds a de-noise smoothing pass to eliminate sample stepping. |
| 3 | 64 samples | Two-pass | Dense sample distribution with de-noise pass. |
| 4 | 96 samples | Two-pass | Highest quality; smoothest out-of-focus blur and highlight spread. |
Image and movie exports use the same DOF quality level as the viewport. The default (4) is already the highest.
Scatter-based bokeh
Section titled “Scatter-based bokeh”RayMol’s depth of field pipeline uses scatter-based bokeh. Out-of-focus highlights bleed outward over foreground and background silhouettes rather than gathering strictly within object boundaries.
When exporting transparent PNG images, depth of field blur is computed with a halo-aware matte so that soft bokeh fringes correctly composite over light or dark presentation slides without dark outline fringing.
Autofocus
Section titled “Autofocus”Rather than adjusting the focus distance manually with a slider, you can lock the focal plane onto specific atoms or residues.
Lock focus to a selection
Section titled “Lock focus to a selection”- Select the atoms or residues you want in sharp focus (for example, a bound ligand or mutation site).
- Turn on depth of field (Enabled in the camera dock, or Depth of field in Display ▸ Camera).
- Turn on Auto lock in the camera dock (or Auto lock focus in Display ▸ Camera;
set metal_dof_autofocus, 1).
select dof_focus, (sele)set metal_dof, 1set metal_dof_autofocus, 1RayMol creates a dedicated target selection named dof_focus and locks the
focal distance to its centroid. As you rotate, tumble, or zoom the camera,
the focal plane dynamically tracks the target, keeping those atoms pinned in
sharp focus while the rest of the molecule blurs.
To re-target autofocus to different atoms, select the new atoms and toggle Auto lock off and on again.
Lock focus from the context menu
Section titled “Lock focus from the context menu”You can also auto-lock focus directly from the 3D viewport without opening any panels:
- Right-click on macOS, or long-press on iPadOS or iPhone, on any atom or residue in the viewport.
- Choose Auto-lock focus from the context menu.
RayMol immediately turns on depth of field, enables autofocus, and snapshots
that residue into dof_focus.
Settings summary
Section titled “Settings summary”The following settings control the camera and depth of field in RayMol:
| Setting | Type | Range / Options | Default | Description |
|---|---|---|---|---|
field_of_view |
float | degrees (the Lens slider covers ≈10°–90°, i.e. 135–12 mm) | 20.0 (≈68 mm) |
Vertical field of view. The Lens slider shows it as a 35 mm-equivalent focal length; set_fov changes it with a dolly zoom. |
ortho |
boolean | 0 (off), 1 (on) |
0 |
Orthographic projection toggle |
metal_dof |
boolean | 0 (off), 1 (on) |
0 |
Depth of field post-process toggle |
metal_dof_autofocus |
boolean | 0 (off), 1 (on) |
0 |
Automatically track centroid of dof_focus |
metal_dof_focus |
float | 0.0 – 120.0 |
0.0 |
Eye-space focus distance (0 = center of interest) |
metal_dof_range |
float | 0.0 – 60.0 |
14.0 |
Distance beyond focus before maximum blur |
metal_dof_aperture |
float | 0.0 – 40.0 |
14.0 |
Maximum blur radius in pixels (0 = no blur) |
metal_dof_quality |
integer | 1 – 4 |
4 |
Bokeh gather quality level (16 to 96 samples) |
Worked example
Section titled “Worked example”# Load a structure and show as cartoon with stick ligandfetch 1hsg, async=0as cartoonshow sticks, organic
# Set up a portrait lensset_fov 16 # ≈85 mm portrait lensset ortho, 0
# Focus sharply on residue 48 and blur surrounding loopsselect dof_focus, resi 48set metal_dof, 1set metal_dof_autofocus, 1set metal_dof_range, 8set metal_dof_aperture, 20set metal_dof_quality, 4See Rendering & Export for details on combining camera settings with ray-traced shadows and ambient occlusion, Studio Lights & Atmosphere for lighting rigs, and Movies & Scenes to animate camera transitions.